Our Van Conversion Story

A Basic Guide to our Van Build of a 38 year old Mercedes 307d
It took Lou and I 6 months to complete our van conversion, though I think that it would be possible to do it quicker if you don't film and are in a location that had a functional shipping address. Unlike many other van builds I've seen, we bought a rusty old van that had a full interior that we decided to take out so that we could refurbish the van completely and manage all the water damage and this extra demolition and refurbishing added many months of work too.
[youtube=://www.youtube.com/watch?v=lBDyfI16iZo&w=854&h=480]
Here is a very basic guide to our entire build in case you wanted more information from our van conversion video.
OUR TOOLS*:
Battery Powered Bosch Tools (we bought them as one huge kit which was more affordable, but I can’t seem to find the package we bought)
EXTRA SUPPLIES:
-
Head Lamp for working in the night

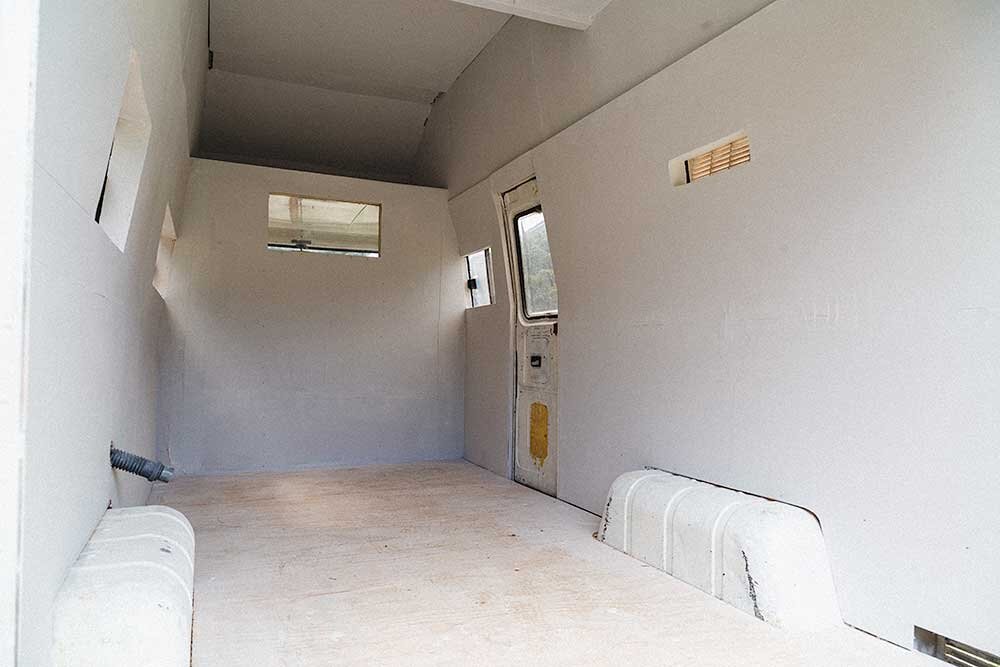
Part 1: Demolition
- To deal with the water damage and start from scratch we took out EVERYTHING that was in the van. This means the old furniture, the old gas lines, every screw, and this process took a week.
Part 2: Rust Treatment
- Sand any metal that had rust on it
- Paint with rust solution to stop the spread (like this metal treatment)
- Paint with a rust resistant paint for added protection (like this metal paint)
- Patch any holes where the rust has eaten through the metal (like this fiberglass patch kit)
Part 3: Install Any Extra Windows or Fans and Make Van Watertight
- We installed a vent later on and definitely regretted not doing it during the early stages of the build when it would have been much easier. Ceiling window/fan units seem like the most effective choice, but weren't an option for us as we covered our entire roof with solar panels, but if you don't need that much power definitely include that in your van conversion! The links are at the bottom of the post :)
- Seal any leaks, which for us meant dealing with our ancient windows. It is very important that you make sure the van is water tight at this point because later on it will be much harder to solve any leaks.
- We used a sealant like this one
Part 3: Insulation/Wall Construction (about 1 month of work)
- We used natural jute fiber insulation like this Thermo Jute, because it was very important for Lou and I to have a our space be as non-toxic as possible. Because we live in our van full time we knew that we'd be in low winter temps and super high summer temps, we knew a great deal of insulation would be necessary to make Ody livable. A lot of other van lifers though manage seemingly fine without insulating and it definitely makes their vans more spacious. This is a personal decision and definitely depends on what sort of environments you plan on taking your van.
- To install the insulation, we made our wall frames first leveraging the metal frame that existed in the van already. For your build to be strong and safe, make sure that you are always screwing into metal when you are building your walls or attaching anything heavy.
- Be ready for the wall installation to take a long time! None of the surfaces are square. You are constantly building on a slant, making cut-outs for wheel bases and windows, so this is when measuring is most critical. As we said in the video, measure twice and cut once. We definitely tried to do this as best we could, but with all the weird shapes there is definitely a learning curve.
- Once the framing is done, you can put the jute in the respective holes (we attached it temporarily to the walls with a spray adhesive like this one) Then you need to make the walls! We used a very thin water resistant plywood that would not warp with humidity.
Part 4: Construction + Plumbing
- The end of our build got pretty hectic, so it hard to explain exactly what order we did everything. The overall outline is build the framing for the kitchen, bathroom, and bed. Install kitchen counter and make cutouts for the sink, water filtration, and stove top.
-
BATHROOM
-
Separation Toilet Lid like this one
-
We built a box that serves as our toilet and then attached the lid to the top. We put a double bag 100 liter trash bag in which lasts about 2 weeks if we don’t have access to any other toilet.
-
We divert the urine to a 20 liter jug next to the toilet, which we try to empty every other day, but sometimes go a little longer.
-
We have a box filled with wood shavings next to the toilet as well like this one and after going number two you put a few scoops of that in. Ideally we aren’t in the van together while going to the bathroom, but if we are noise cancelling headphones and burning Palo Santo make it way less awkward. Definitely one of the hardest things to get used to living in a van, but worth it for all the amazing adventures we get to have together.
-
Here’s a newsletter I wrote all about how we chose this bathroom set-up
-
-
PLUMBING
-
The hardest part of plumbing is finding the right size pipes and connectors because everything that can fit in a van is much smaller than standard size
-
We have a 110 Liter Water Tank like this one
-
A water pump like this one
-
An accumulator like this one
-
An Acuva Eco water filter — use our code “WILDWEROAM” at checkout
-
-
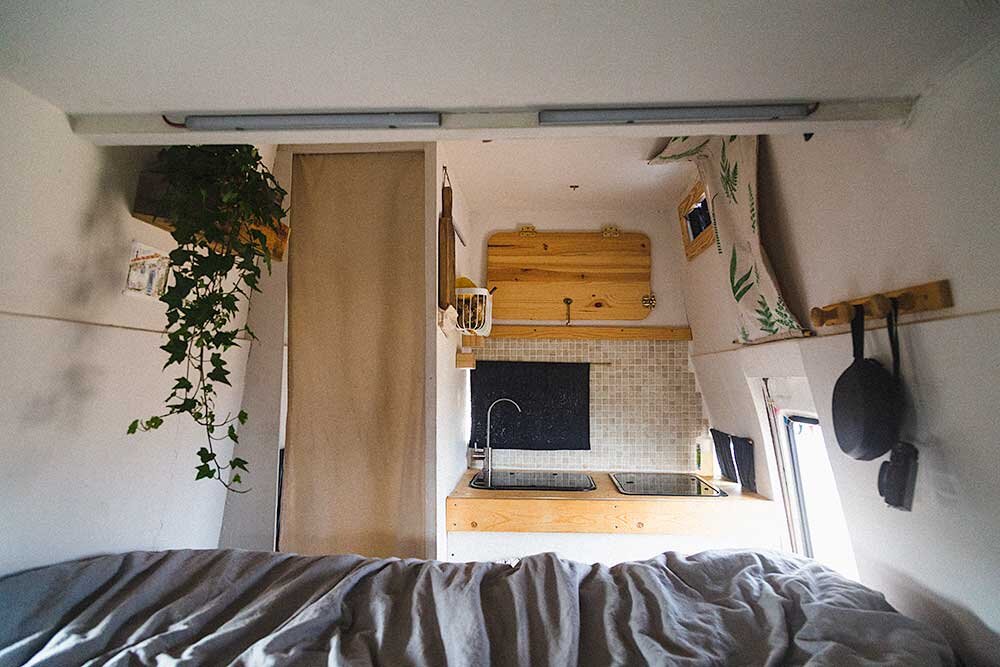
KITCHEN
-
Our Stove - DOMETIC HBG 2335
-
Our Refrigerator - DOMETIC CoolMatic CRX 80 (The freezer part doesn’t work so well, so if we could do it again I would get a full fridge no freezer to have more space)
Part 5: Electrical
-
3 SunFlare CIGS Panels attached with 3M double sided tape (the large two are 230 W peak power and the small one is 77 W peak power) These panels are not for sale to the consumer at this moment.
-
2 Charge Controllers
-
2) 10A 12/24V
-
160 amp hour lithium battery like this one
-
12v fuse panel like this one
-
A fuse assortment like this one
-
100 amp fuse like this one
-
1500W inverter - like this one
-
A switch panel like this one
-
Electrician scissors like this one
-
Wire crimper tool like this one
-
Heat shrink wire connectors like this one
-
Battery keys like this one
-
Battery charger like this one (we have the 15 amp version)
-
Light strip like this one
We are really happy with how our "power plant" turned out and it takes care of all our needs. I highly recommend investing in a charger like this one so that if your get a couple rainy days in a row and your battery is getting low you can go to a campsite and plug in.
I know this isn’t a full explanation of how to make an electrical set-up in the van, but we found Van Dog Traveller’s guide very helpful. It is important to spend time making your plan for your system and if you’re lucky enough to know an electrician have them take a look at it. Check out some books from the library and spend time diving into the world of Youtube to get your bearings.
Part 5: Final Touches
-
Curtains:
-
I made us curtains by hand and would highly recommend using blackout curtain fabric if you have any large windows in your van. I did one side of the curtain black out material and the other side a decorative fabric that went with our color palette. I used a linen fabric to make our other curtains which I wouldn't recommend. The fabric isn't heavy enough so the curtains even with magnets haven't stayed in places as well as the thicker black out material ones I made.
-
-
Storage:
-
Vans are tiny spaces and the better your organization system the higher quality life you will have. When we switched out our bed, from a thick foam mattress to a small mattress topper (such an improvement!) we ended up having more space on the side of the bed. Lou bought a bunch of different baskets that fit perfectly in that nook and they are now home to almost all of our computer and camera supplies.
-
-
Mosquito Nets:
-
Don’t forget to get something like this. We didn't have mosquito nets at first and it was probably our biggest rookie mistake!
-
-
Fans
-
Last summer we added a vent above our kitchen and attached a few computer fans in front of it and wired a switch next to the bed and it was a total life saver!! If you don’t need to cover your roof in solar panels, we would recommend keeping an overhead vent/fan as it is the best for air circulation.
-
-
Standing Desk:
-
Lou and I work at our computers a great deal and this year after Lou hurt his back, he decided to make us a standing desk so we wouldn't be hunched over in beds any longer and it has transformed our van experience! It definitely takes a few weeks to get used to working on your feet, but I would highly recommend it as it increased our productivity and is wonderful for our health.
-
-
Shower:
-
We love our gravity hanging shower and use it all the time whether it’s freezing in the winter or hot in the summer it does the trick - ours is a really old hand me down, but this one looks even better.
-
-
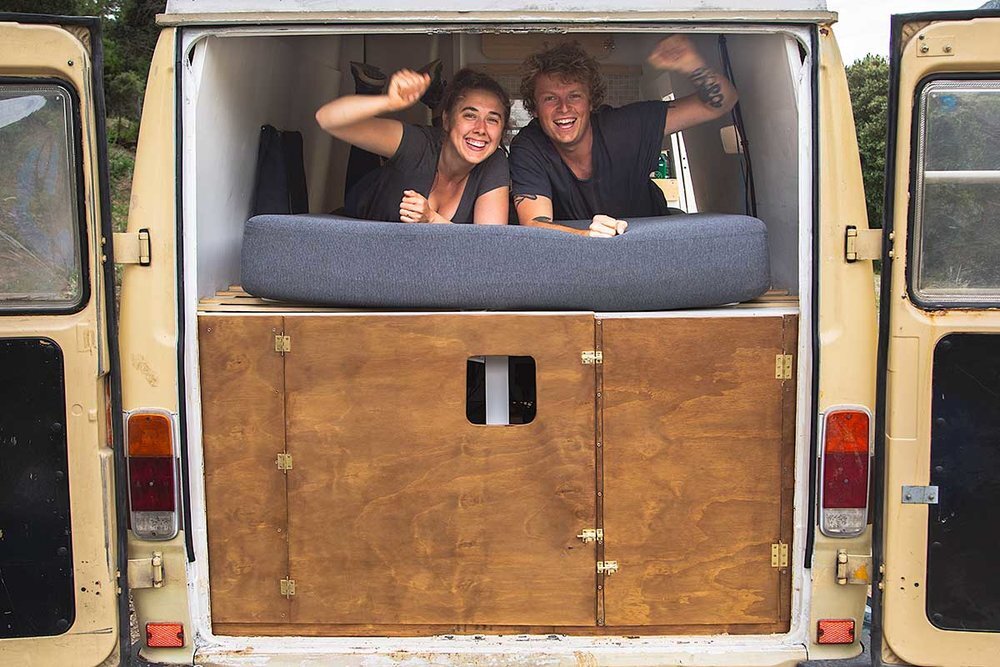
Bed
-
We switched out our first mattress for a Tussöy IKEA mattress topper and ABSOLUTELY love it!
-
I am so proud of how much Lou and I grew during this van build experience. We learned so much from construction to plumbing to electrical, but also learned about how to communicate, work together effectively, and never give up on a dream. I hope that if you’re considering building a van that this was helpful or inspiring. We also have a 22-part van build series that goes into more detail on each aspect of our van conversion. Thank you so much for joining us on this crazy adventure. Van life is one of the wildest things we have ever done and I’m so happy that we get to share all the highs and lows with you.
[youtube=://www.youtube.com/watch?v=MPGEZkyrtic&w=854&h=480]
* This blogpost includes Amazon affiliate links. Lou and I are participants in the Amazon Services LLC Associates Program, an affiliate advertising program designed to provide a means for us to earn fees by linking to Amazon.com and affiliated sites.